Category Archives: Hardware

Dodgy Work

Capturing some of the journey and questions I need to ask for the new dodger that is in the works.

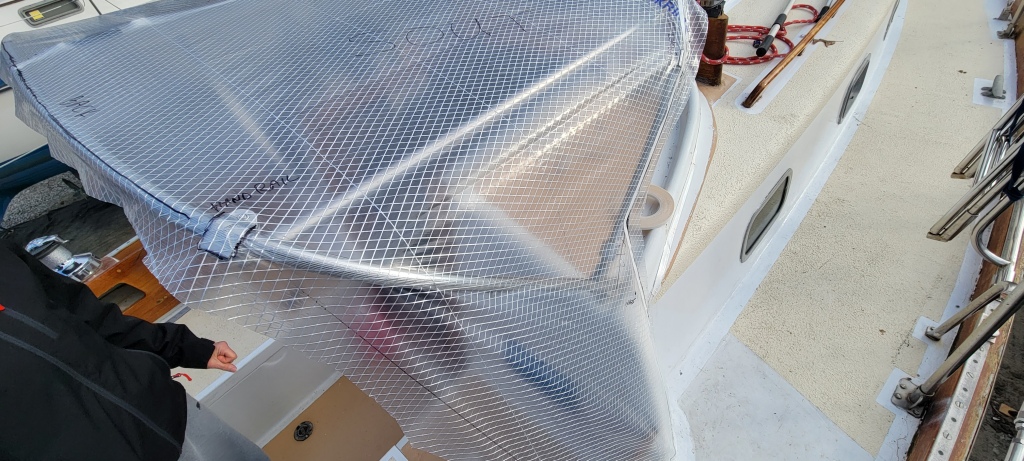
The frame upgraded with supports and handles. The handles are more on the top as this is where people put their hands – whether there is a rail or not.
The aft end of the hand rail sticks of the back – will it get in the way of the sleeve – will need to modify template?
The above two show the template getting distorted by the handle and support brackets.
These are all assorted side views. My question for folks is will I need to do cut outs for the handle brackets, and potentially the support bracket? The support bracket, I can handle with some chafe gear perhaps. NOTE the handles are upside down now so that I can get the template fitted.

The other comment is that the Sailrite instruction video did not have the side of the dodger coming down to the coaming and away from the frame as mine is. Are there any issues with doing this? I plan on just templating as is.

Leave a comment

Filed under canvas, Deck

2019 Winter Engine Work

ok here we go. Tranquility has a Westerbeke M40. This seems to be the 4108 that everyone talks about. The boat is a ’78, and the engine has about 3800 hours. It runs well, with a very steady rhythm – sounds very solid. I saw the old owner drive it, so I am a bit worried about the transmission, which is a Hurth Transmission so in that sense it should be easy to get serviced and parts. The following is what is top of mind while the boat is on the hard this winter.

There are a few obvious issues:

  1. What looks like an oil leak from the valve cover. I had a mechanic look at it, and he said it was a diesel leak. However, no diesel smell, I am not buying it. My guess is that the top of the engine needs a round of new crush washers and gaskets
  2. A good clean – really how hard is it to clean, and if you do not clean how do you know where the issues are? Right now as I clean the engine, I will find where issues are. She is not burning oil that much so no serious leaks methinks.
  3. Water pump rear seal leak – remove and rebuild. This is a Sherwood pump, with one of those funky keys that will fall in the bilge. The question I have is whether or not it make sense to go with another kind of pump with no key – Johnson?. It will depend on what pumps are available that can be mounted on the Westerbeke – which is driven from the engine rather than from a belt.
  4. There was no sea strainer – really! There was some kind of strainer that was an antique when the boat was built, but based on the crud in pipe going into the cooling system, I am guessing it did not do that well. The engine is running a tad hot – not much, but a little, and I am guessing it needs a birthday. Put in a Groco sea strainer, new hoses, and flush out system. Do I rebuild the heat exchanger?
  5. The hot water heater is fed from the engine with a huge pipe. The effect is: 1) the pipe lays across the top of the engine, and impedes the whole bleeding process; and 2) the locker with the hot water heater in it gets really nice and hot – which happens to be the same locker that holds the refrigerator cooling unit.
  6. The stuffing box is totally hosed! Good pun eh? There is no room to loosen the stuffing box nut and remove / replace the stuffing material. This was not the way it was built. Either the engine has sagged on its mounts and is further back than original, or the stern hose has slipped forward on the stern tub. When I purchased the boat, the stuffing box was leaking so badly that the whole back end of the engine box was covered in salt – a lot of it. Anyway, it all needs a birthday, the hose looks as if it is on its last legs – need to remove shaft, replace stern tube hose, repack stuffing box with supper duper teflon stuff, and with a shorter hose, and I will be set
  7. Deal with the salt issue. The transmission needs paint, and the shaft was spinning water up to the tank above it (below cockpit), which is a steel or monel tank. It needs TLC. At some point it may need replacing, but there is no reason it should not last with care.
  8. No sound proofing – really, 40 years old, and no one put any sound proofing in engine box.
  9. The surveyor recommended putting a vacuum gauge on top of the fuel filter – which is a Racor 500. This will provide an indication of when things are getting clogged up and the filter needs changing.

Anyway below are pictures that I will add to.

The big hose across the front and along the top of the engine are to the hot water heater. normally these are smaller hoses. I am thinking about taking these off
Everything needs a good clean and paint.

This is the view of the stern tube before I replaced the hose clamps and cleaned it. Wow – old owner indicated that he had cleaned things, but that is salt that has been sitting there a bit (white stuff on left) . I cleaned it all off and it looks pretty good. It did not seem to do any last damage – etching of the aluminium, etc.

This is transmission with no salt on it with the gear shifter on the left. It rusted through at the conclusion of the delivery trip (as I was approaching dock or course). I think the salt was holding it all together. I put the ties on it to get me out to the mooring
I replaced the end cap on the cable and wire brushed everything. I will steam clean and paint over the winter.

I took the raw water pump off as it was leaking.

This is a Sherwood F 85 I believe
So if sea water is coming from the back of the pump into this cavity, can it get into the engine?
This is the sea strainer. Based on build up that was inside the pipe, thinking that a good flushing is required. Mechanic that looked at the engine indicated that probably should flush out the Heat Exchanged to make sure that it is de gunked.

1 Comment

Filed under Engine, Mechanical, Propulsion, Uncategorized

Rudder Work #3 -Coming back together.

All done – very nice. More to follow once I get the toe rail back on 🙂


Very smooth finish with the bronze rods peened over rather than using bolts.

This is a placeholder to get some pictures up here – narrative to follow.

All the bronze pieces back from the shop
Dry fitting all went back together – whew
Shoe fits like a glove. New pin has absolutely no place to go

Peening over bronze to fasten the pintel – Good fun bashing something until it does what you want 🙂

Leave a comment

Filed under Maintenance, Mechanical, Rudder, Structural

Rudder Work #2 – We have a plan!

Ok, rudder is off and we have a plan. First we had to get the rudder off by un-bolting the top half of the rudder post. The tiller head was just too tightly attached.

20190123_162420

This is not ideal, as the flange on the rudder post on the top side in the cockpit has come loose, and I would have liked to fix that. Also, would have liked to put some of the Delrin bushings in that others have done. Anyhow – baseline is that the rudder is getting reworked and then reattached to the post without removing it. We can see what the budget looks like when we get further down the road.

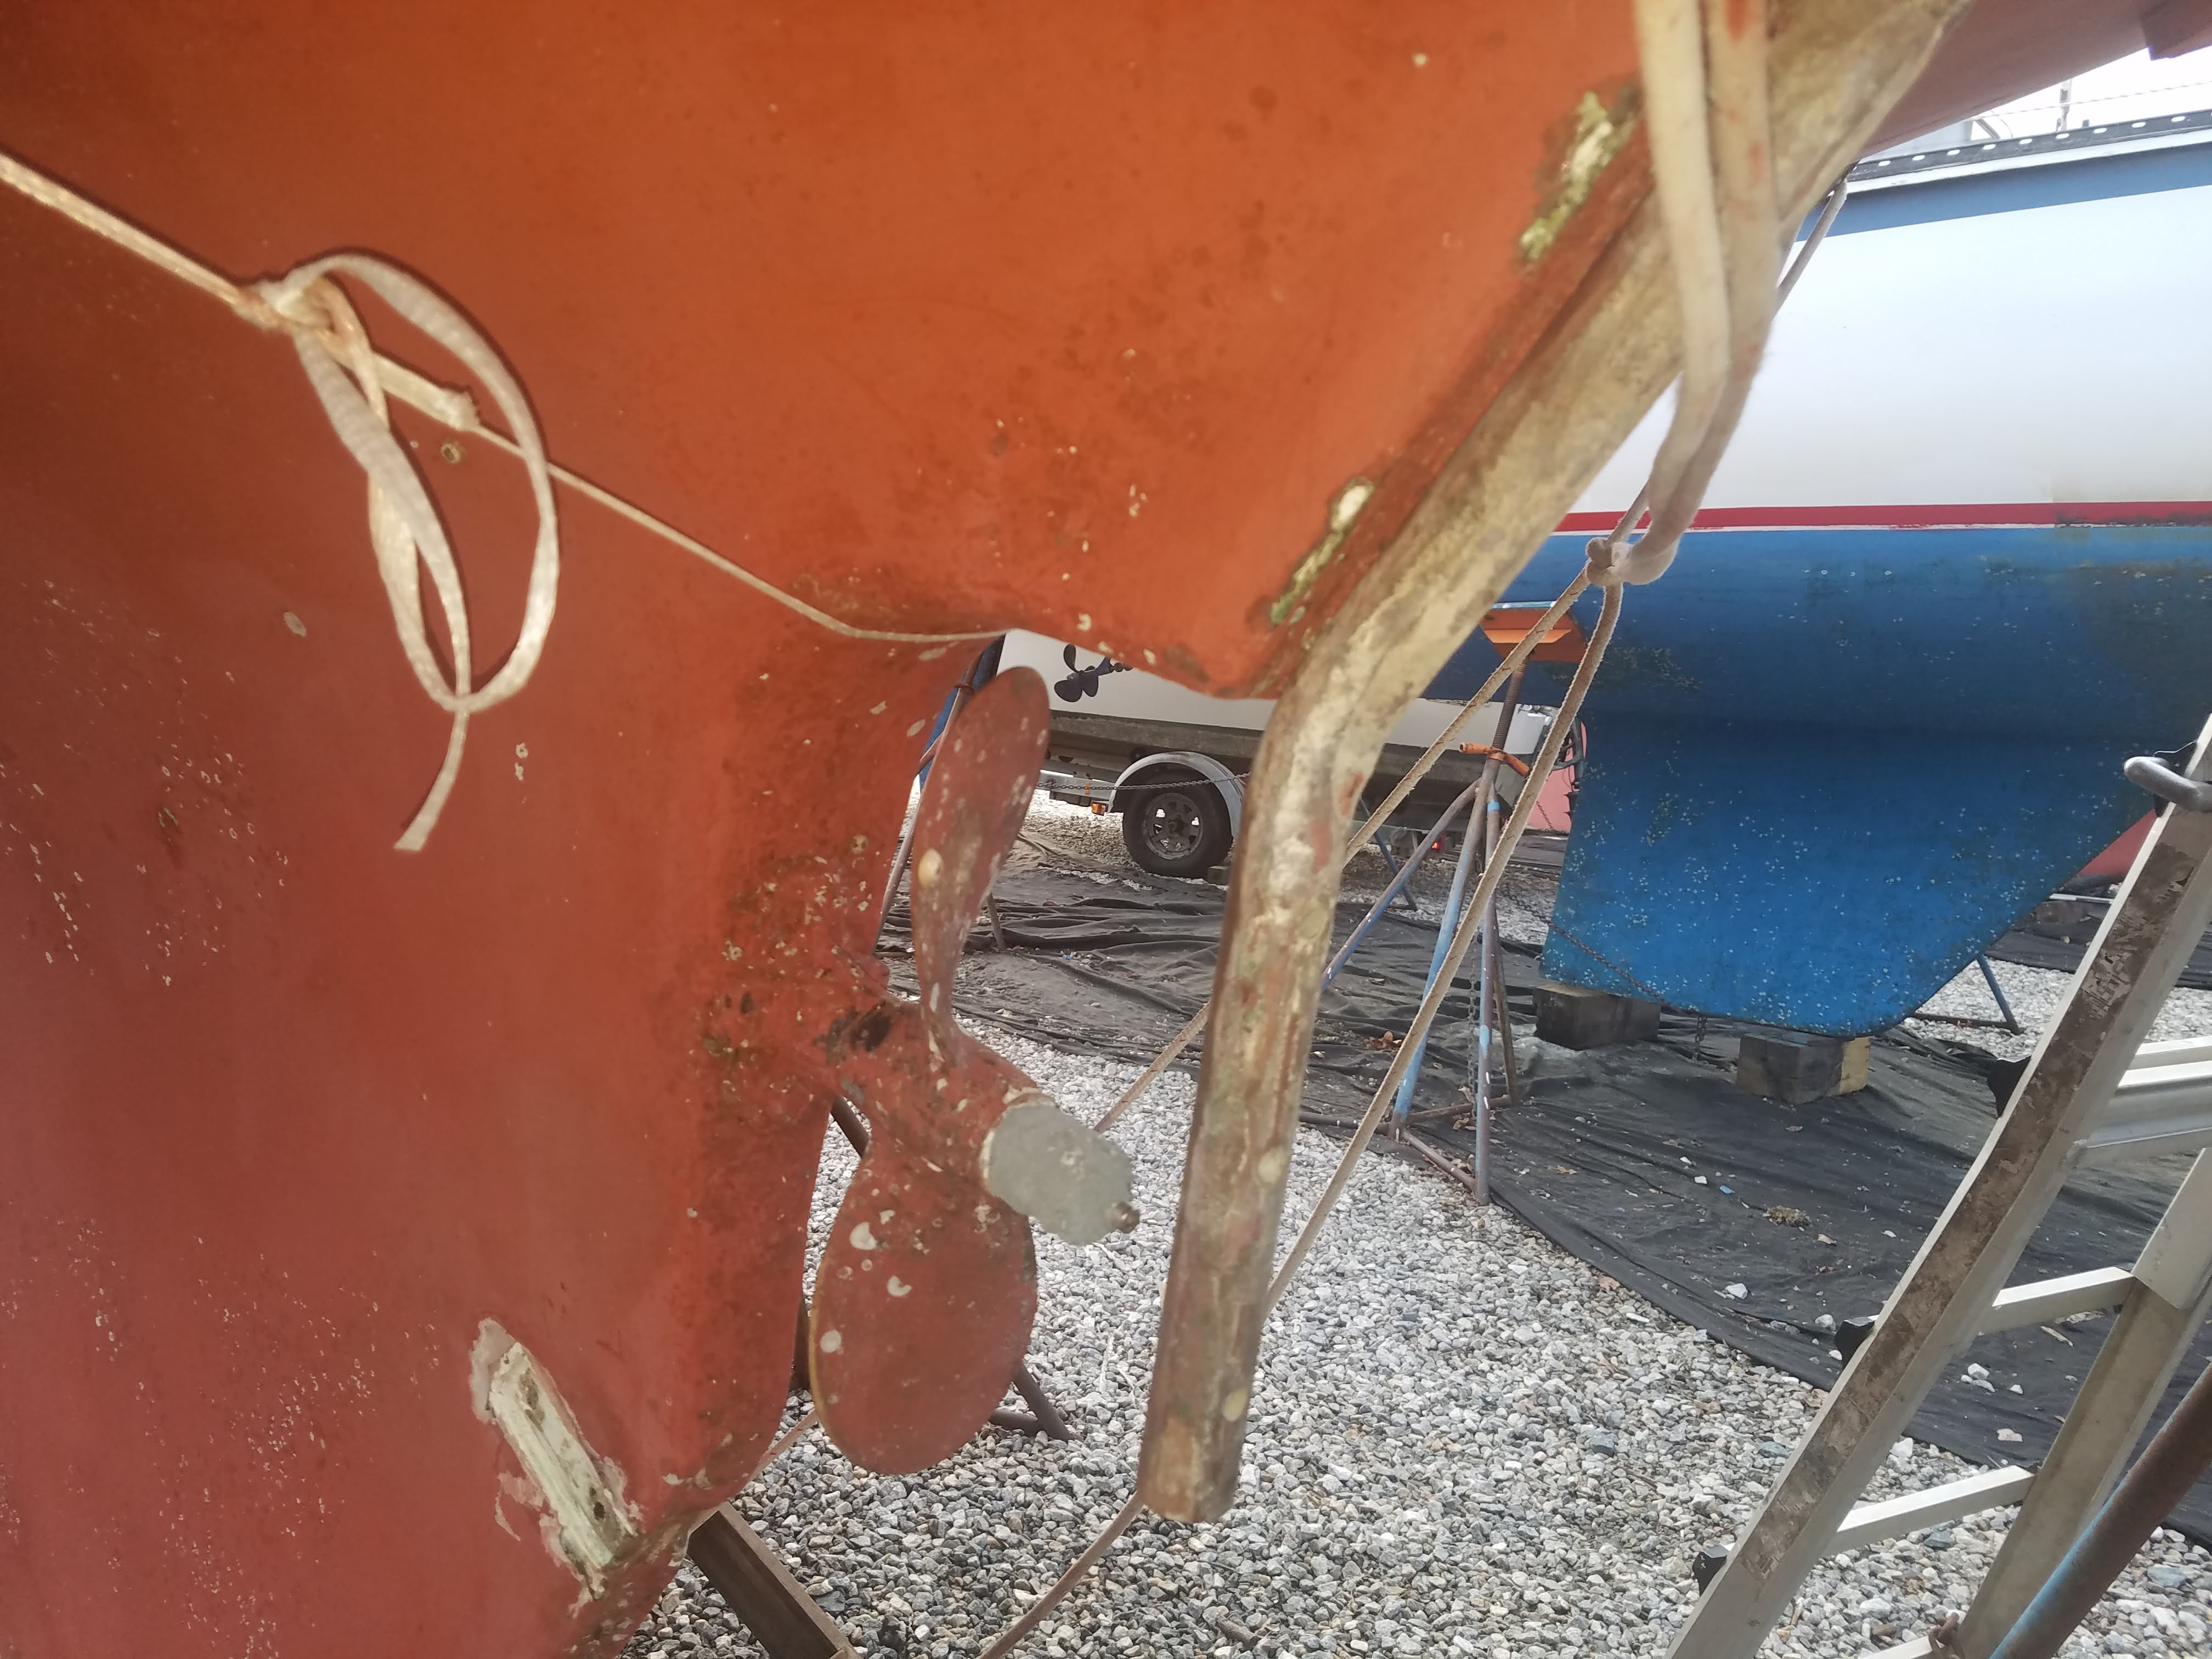
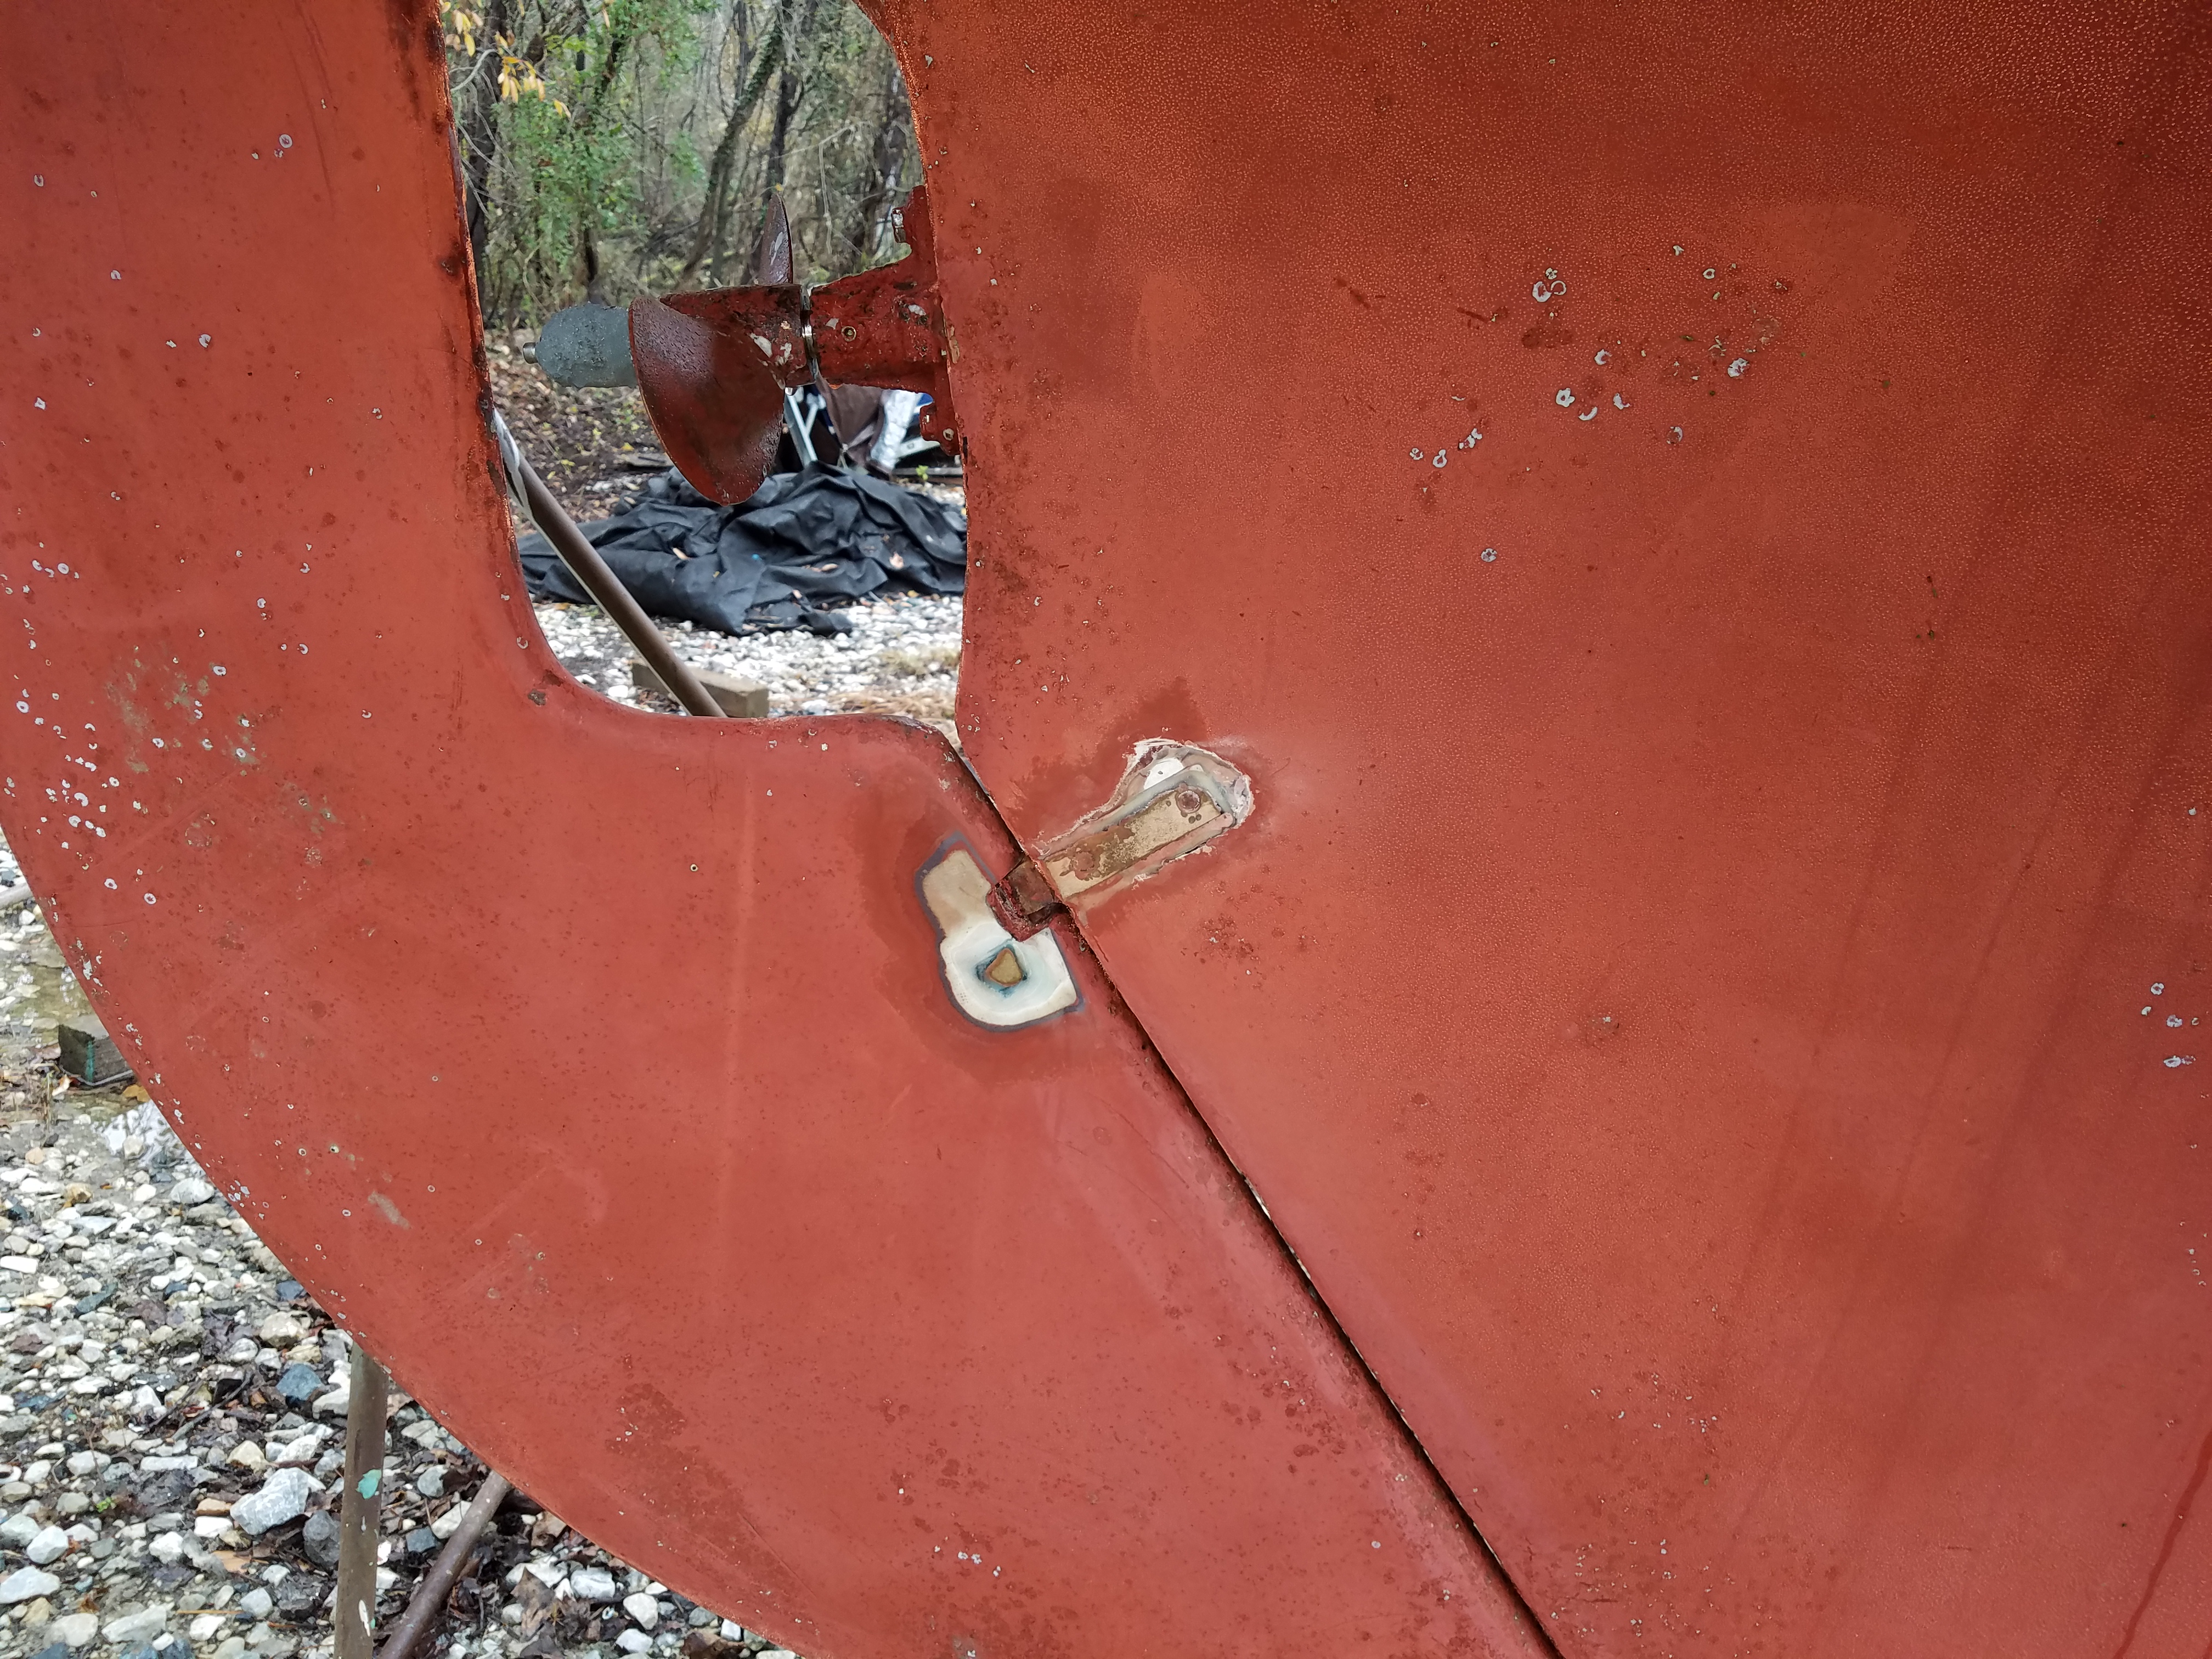
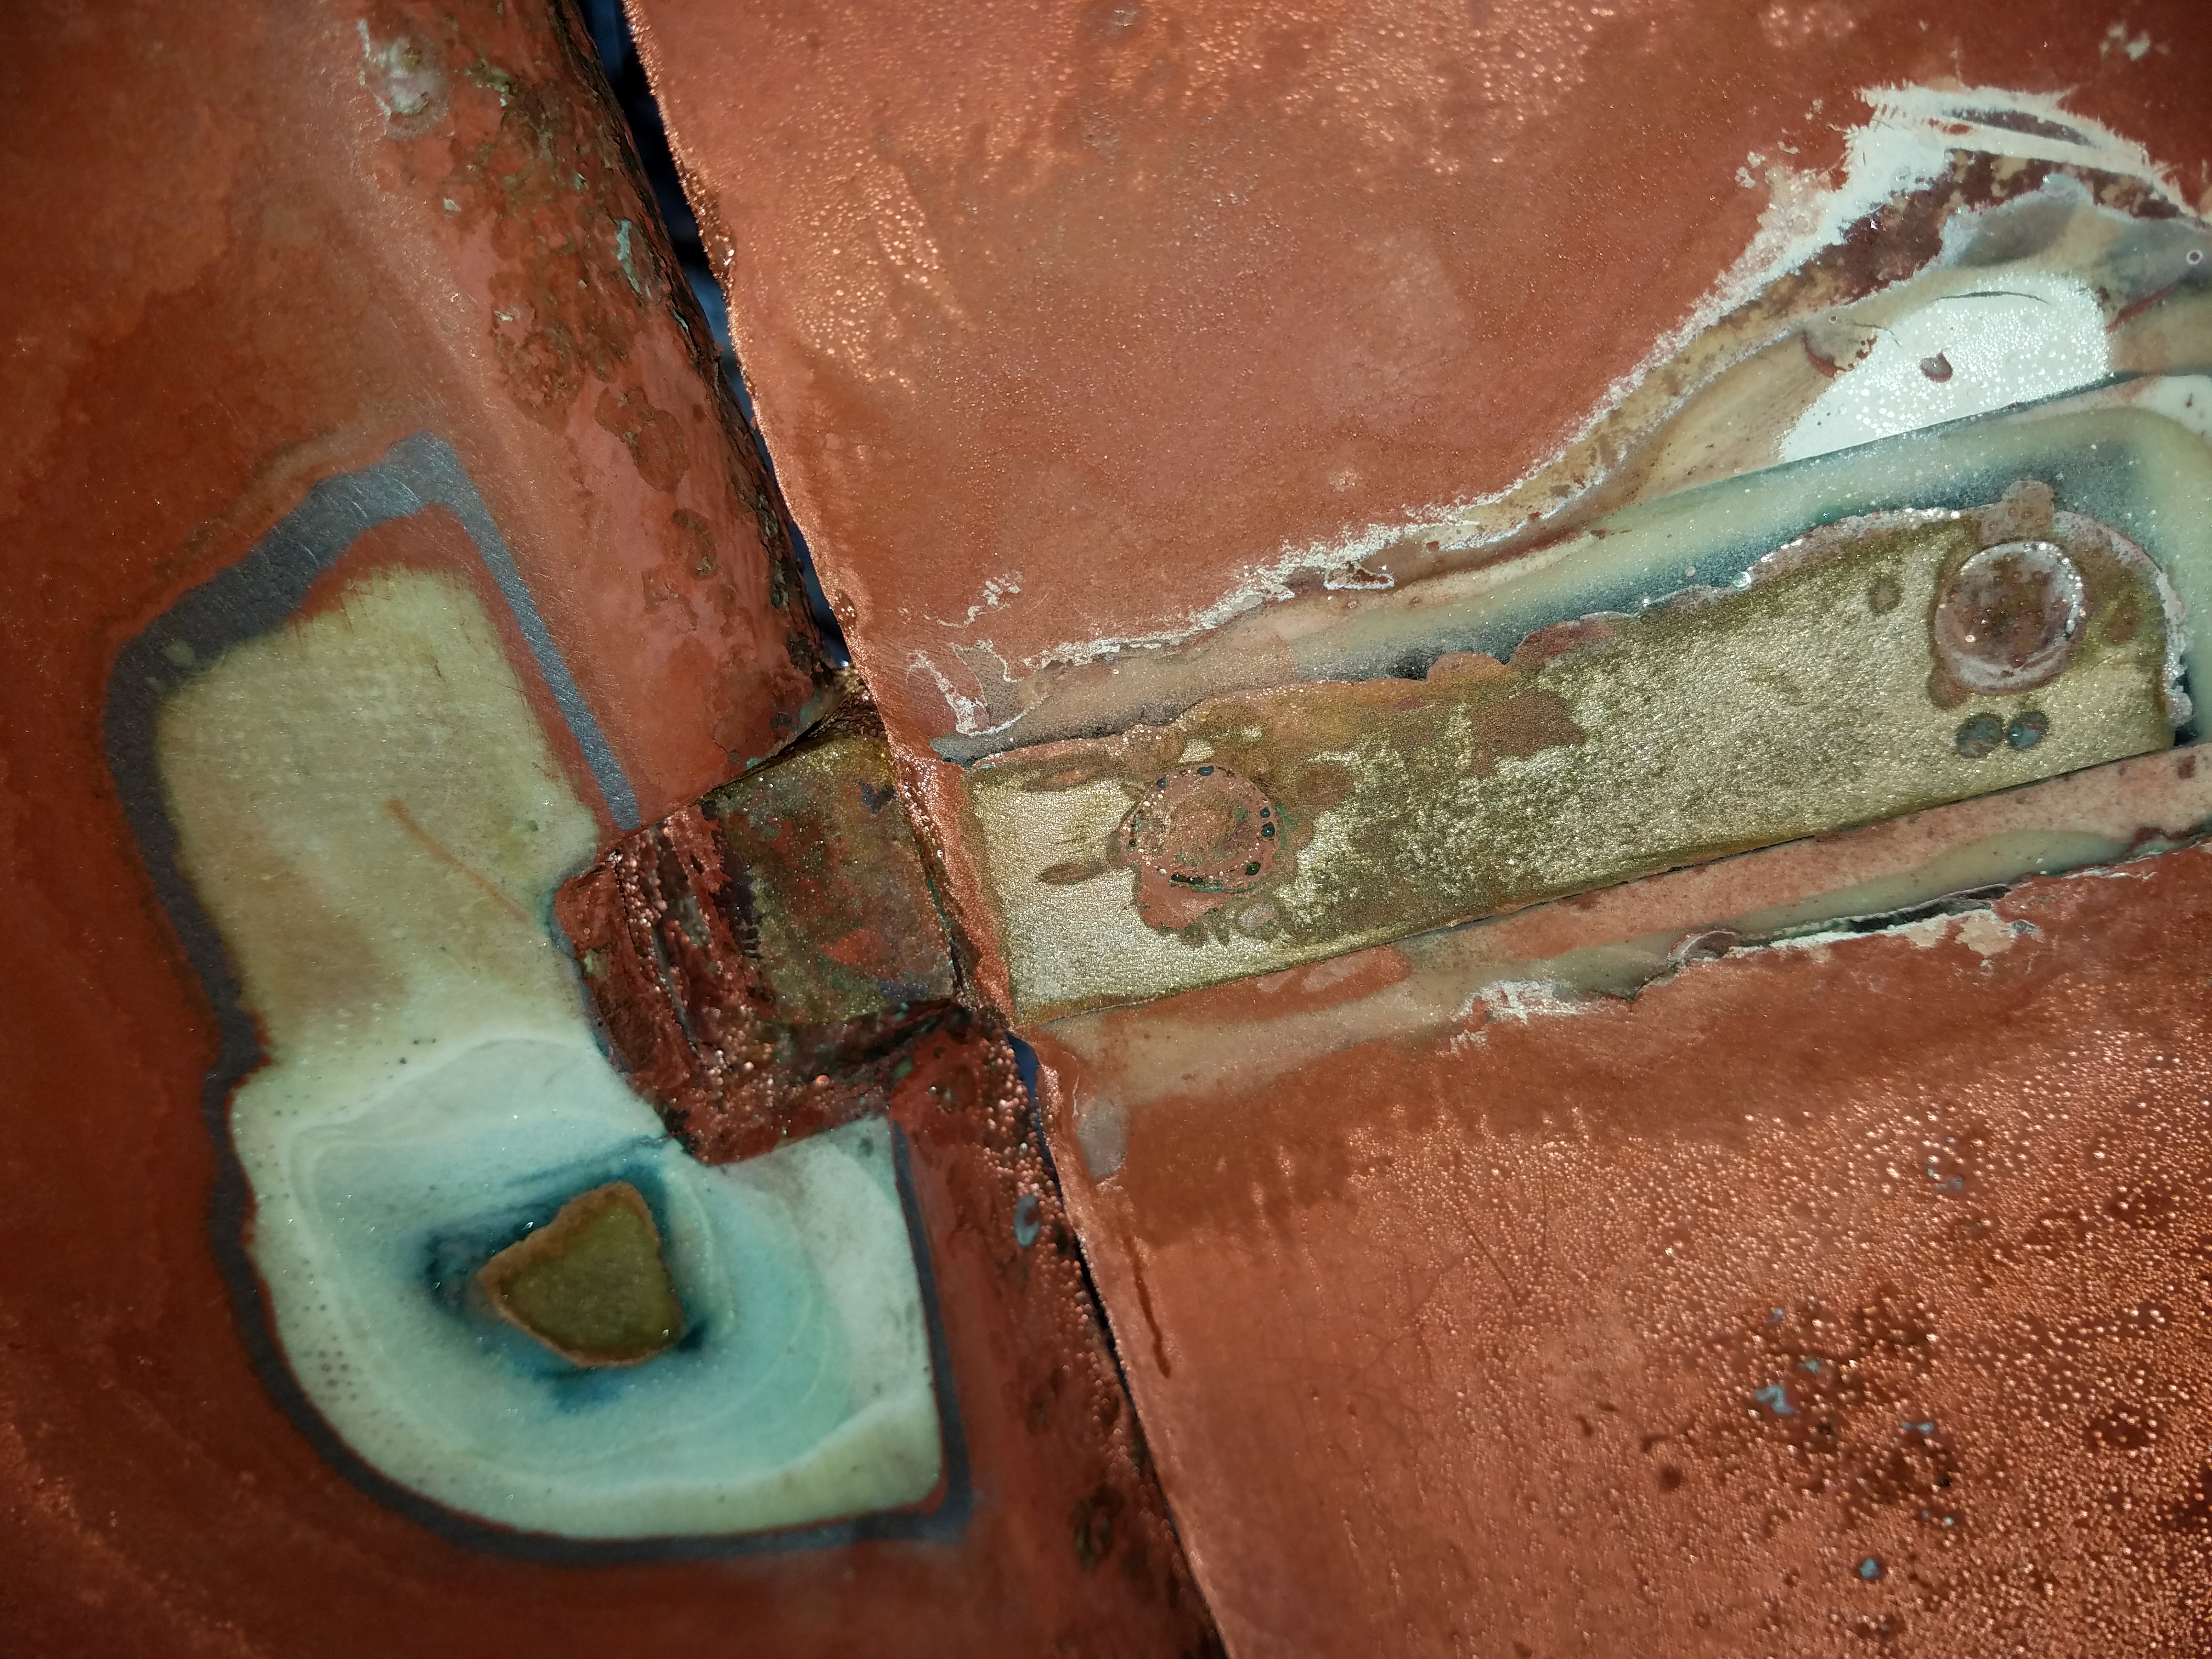
The pintal is totally hosed – note in the picture that it is almost non existent. However, basically the hardware can all be saved, we just need to put in the appropriate sized bolt. This is a one piece gudgeon, which means that putting the rudder back on is a pain as the pintal and gudgeon have to be attached to each other, the rudder placed, and then the hardware attached to the boat. They make two piece gudgeons (I found this good article on the A30 site on two piece gudgeons). I also found this link which references some different product that sounded interesting. Click on the images to get a larger picture.

The shoe is in good shape other than the pin. Which was slopping around in there – note how much room  there was for it to knock around. The pin was also loose from the rudder – the portion with the thread in it, so it was basically floating. I think the solution here is to fill the gap with epoxy stiffened with some high strength filler. Part of what got me started on this rudder rebuild was the trip that was planned last year to go to Block Island. I knew the pintle was almost gone and I knew the pin in the shoe was loose. If you are really in the ocean, the shock load on the whole assembly in bad weather with the boat getting knocked around would be significant. If the shoe falls off and the pintle assembly is good, ok – and vice versa. However, if both are weak, then ru roh!

This rudder looks like it has a masonite core. Interesting to see how much glass there is. There was no sign of water ingress.

The challenge here will be glassing it all back in and getting it faired out while the rudder is hung. This is not too hard, but will take a number of layers and  patience (at least if I am doing it).    The good thing here is that there are no structural issues. The rudder was nice and dry, with no signs of water getting to where it should not be.  It should just be a case of building back up the foundation, re-attaching the pintal with a new pin. The pin in the shoe of the rudder looked like it might have to have the threads cleaned before it is bolted back in, and the shoe will need to have the shoe gudgeon (the hole where the rudder pin goes in the shoe?)  re-sized with epoxy.

Not sure how we are going to get that tiller head off … More to follow.

1 Comment

Filed under Maintenance, Rudder

Rudder Work #1

Here is the link on the Alberg 30 page for rudder varients

1/16/19

The pintal is worn down. however, in general the hardware is good. The pin in the shoe was loose, and was not seated tightly but otherwise in good shape. I had it replaced about 10 + years ago, and they used a bolt cut down to size and I am guessing “floating”. Originally it may have been bolted into the rudder post. The yard I had this done in used a cut down bronze bolt, and left the thread on – why they did not use the shoulder where there was no thread I do not know.  The shoe is in good shape. The pin being loose in the shoe is another example of why you always need to check a boatyard’s work. Basically my assumption now is that if a yard thinks you are not going to see something, then they will cut corners. I am becoming a skeptical bastard in my old age!

Anyway. shaft needs to come out, and rudder head needs to come off – both are in process.

20181202_125423

The hardware is well glassed in, and uses a rivet type fastening approach. I need to find out what these are made of – in my past I have heard of copper fastenings applied this way. The pintal is facing up – the pin hooks up –  so that the rudder can slide on while the gudgeon is in place. This looks like a one piece gudgeon.

20181202_125330

Here is a closer look. You can see how loose the pin is in the gudgeon – basically rattling around in there.

20181202_125337

There is an A30 down the way (Slainte) that has the hardware bolted in


Leave a comment

Filed under Hardware, Maintenance, Rudder

Replacing the Toe Rail

This is a bit of a placeholder, and will get updated over time.

1/13/19 Some Pics and current thinking: The Template that I scribed off the boat, and then transferred them to the paper taped to the floor to figure out how to cut what I needed out of the 3’x4′ sheet of G10. I then glassed the three pieces of g10 together and will cut the bases out of that. I can then fit the teak rail on top to raise up the total height to ~1.5 inches.

1/13/19 Note from Charles Pleisse on Vendors:

Coosa Board: Coosa Bluewater 26.  It is available from a local distributor in Baltimore called Total Plastics International.  A 3/4″-4’x8′ sheet of the stuff is $276, less than half the bd.ft cost of teak.  I looked here for the price and it was about the same as G10. Note that I ended up getting the 1/4′ G10 which is actually cheaper.

Fasteners: Albany County Fasteners (866)573-0445.   I was able to get everything needed in 316 stainless for just a hair over $100.

INITIAL FACEBOOK THREAD

Leave a comment

Filed under Deck, Hardware, Products, Structural, Uncategorized

Chainplate Covers

The following are augmented notes from Charles’ August 2017 facebook post

The picture on the left is from this project. The one on the right is from Guy Lefebvre who used soup spoons for a different look.

The riser is 1/4″x2″x3″ G10 stanchion backing plate sold by Jamestown Dist.
Using a table saw, I cut them down to be about 3/8″+/- wider than the caps
then rounded the corners on a belt sander. I drilled two holes in each to
create the ends of the slot for the chainplate and removed the remaining
material from between the the holes using a cutting wheel on a dremel
tool. Then primed and painted each on all surfaces to be exposed leaving
bottom (side to face deck) naked.

Removed the chainplates and used a rat tail rasp in a drill to clean out
slots in the deck.

I traced the outline of each riser in its place on the deck with pencil to
give a guide to rough the surface for bonding. Roughed the deck w/ small
scrap of 60 grit by hand trying to stay in the lines, (that has been a
challenge for me even back in the Crayola days). Also roughed the bottoms
of the risers.

Bonded the risers in place using Six/Ten, expensive stuff but once you
start using it you realize the value in time saved. Really it pays for
itself in saving waste as you can use what you need and “reseal” the tube.
Coated the bottom of each riser completely and made a tiny fillet around
the base w/ my little finger. After the epoxy dried, it used the drill
w/rat tail rasp on the slots again to clear away the epoxy that squished out
into the slot. Once the epoxy dried I painted a second coat on the riser
mainly to cover the epoxy around the base. This was done out of concern
for UV degrading the epoxy. Pre drilled pilot holes for caps
Re-installed chainplates, filled the remainder of slots with generous goops
of LifeCaulk. Installed chainplate caps with tiny wood screws and cleaned
up with mineral spirits.

Couple additional odd details, Due to the angle of the chainplate for the
backstay, the slot in the cover had to be elongated and the slot in the
riser was “angled” correspondingly using the rasp in the drill. Because
this was all done with the mast up, it was done in two phases. First I did
the four lowers. Once they were all done and that rigging was reconnected,
I did the capshrouds and the backstay. Just as a precaution, I used the
main halyard bridled to the aft deck cleats in place of the backstay.

==================

Chainplate Cover for 84-91/84-81 Chainplates

Weight 1 oz. (28 g) Chainplate Cover fits Chainplates 1 1/2″ (37mm) x 3/8″ (9mm). Overall Size 2 1/2″ x 1 1/4″.

===================


G10 Fiberglass Board

G10 fiberglass boards are made of a special glass epoxy laminate that has extremely high strength. G10 fiberglass is used in marine applications due to its superior strength, moisture resistance, and excellent electrical and fire insulation.

Fiberglass boards make excellent non-corrosive backing plates for high load deck hardware or bond to engine room bulkheads to hold mounting brackets. G10 boards are sold in 1/4 and 1/2 inch thickness.

G-10 is similar in strength and density to starboard, but because it is formed from epoxy resin, it bonds easily using most two-part epoxies.

Available in Backing Plate sizes and full sheets.

1 Comment

Filed under Deck, Products, Rigging, Uncategorized

Cutless Bearing

Here is the link on the A30 site to the information on the bearing that we all seem to have.

The Cutless Bearing is 1 3/8″ O.D. X 7/8″ I.D. The Buck Algonquin name is Barracuda.

The bearing on Laughing Gull was replaced in 2006 or 2007 – not the casing shown in picture on link  just the bearing.

Leave a comment

Filed under Engine, Hardware, Mechanical, Propulsion

Autopilot Discussion

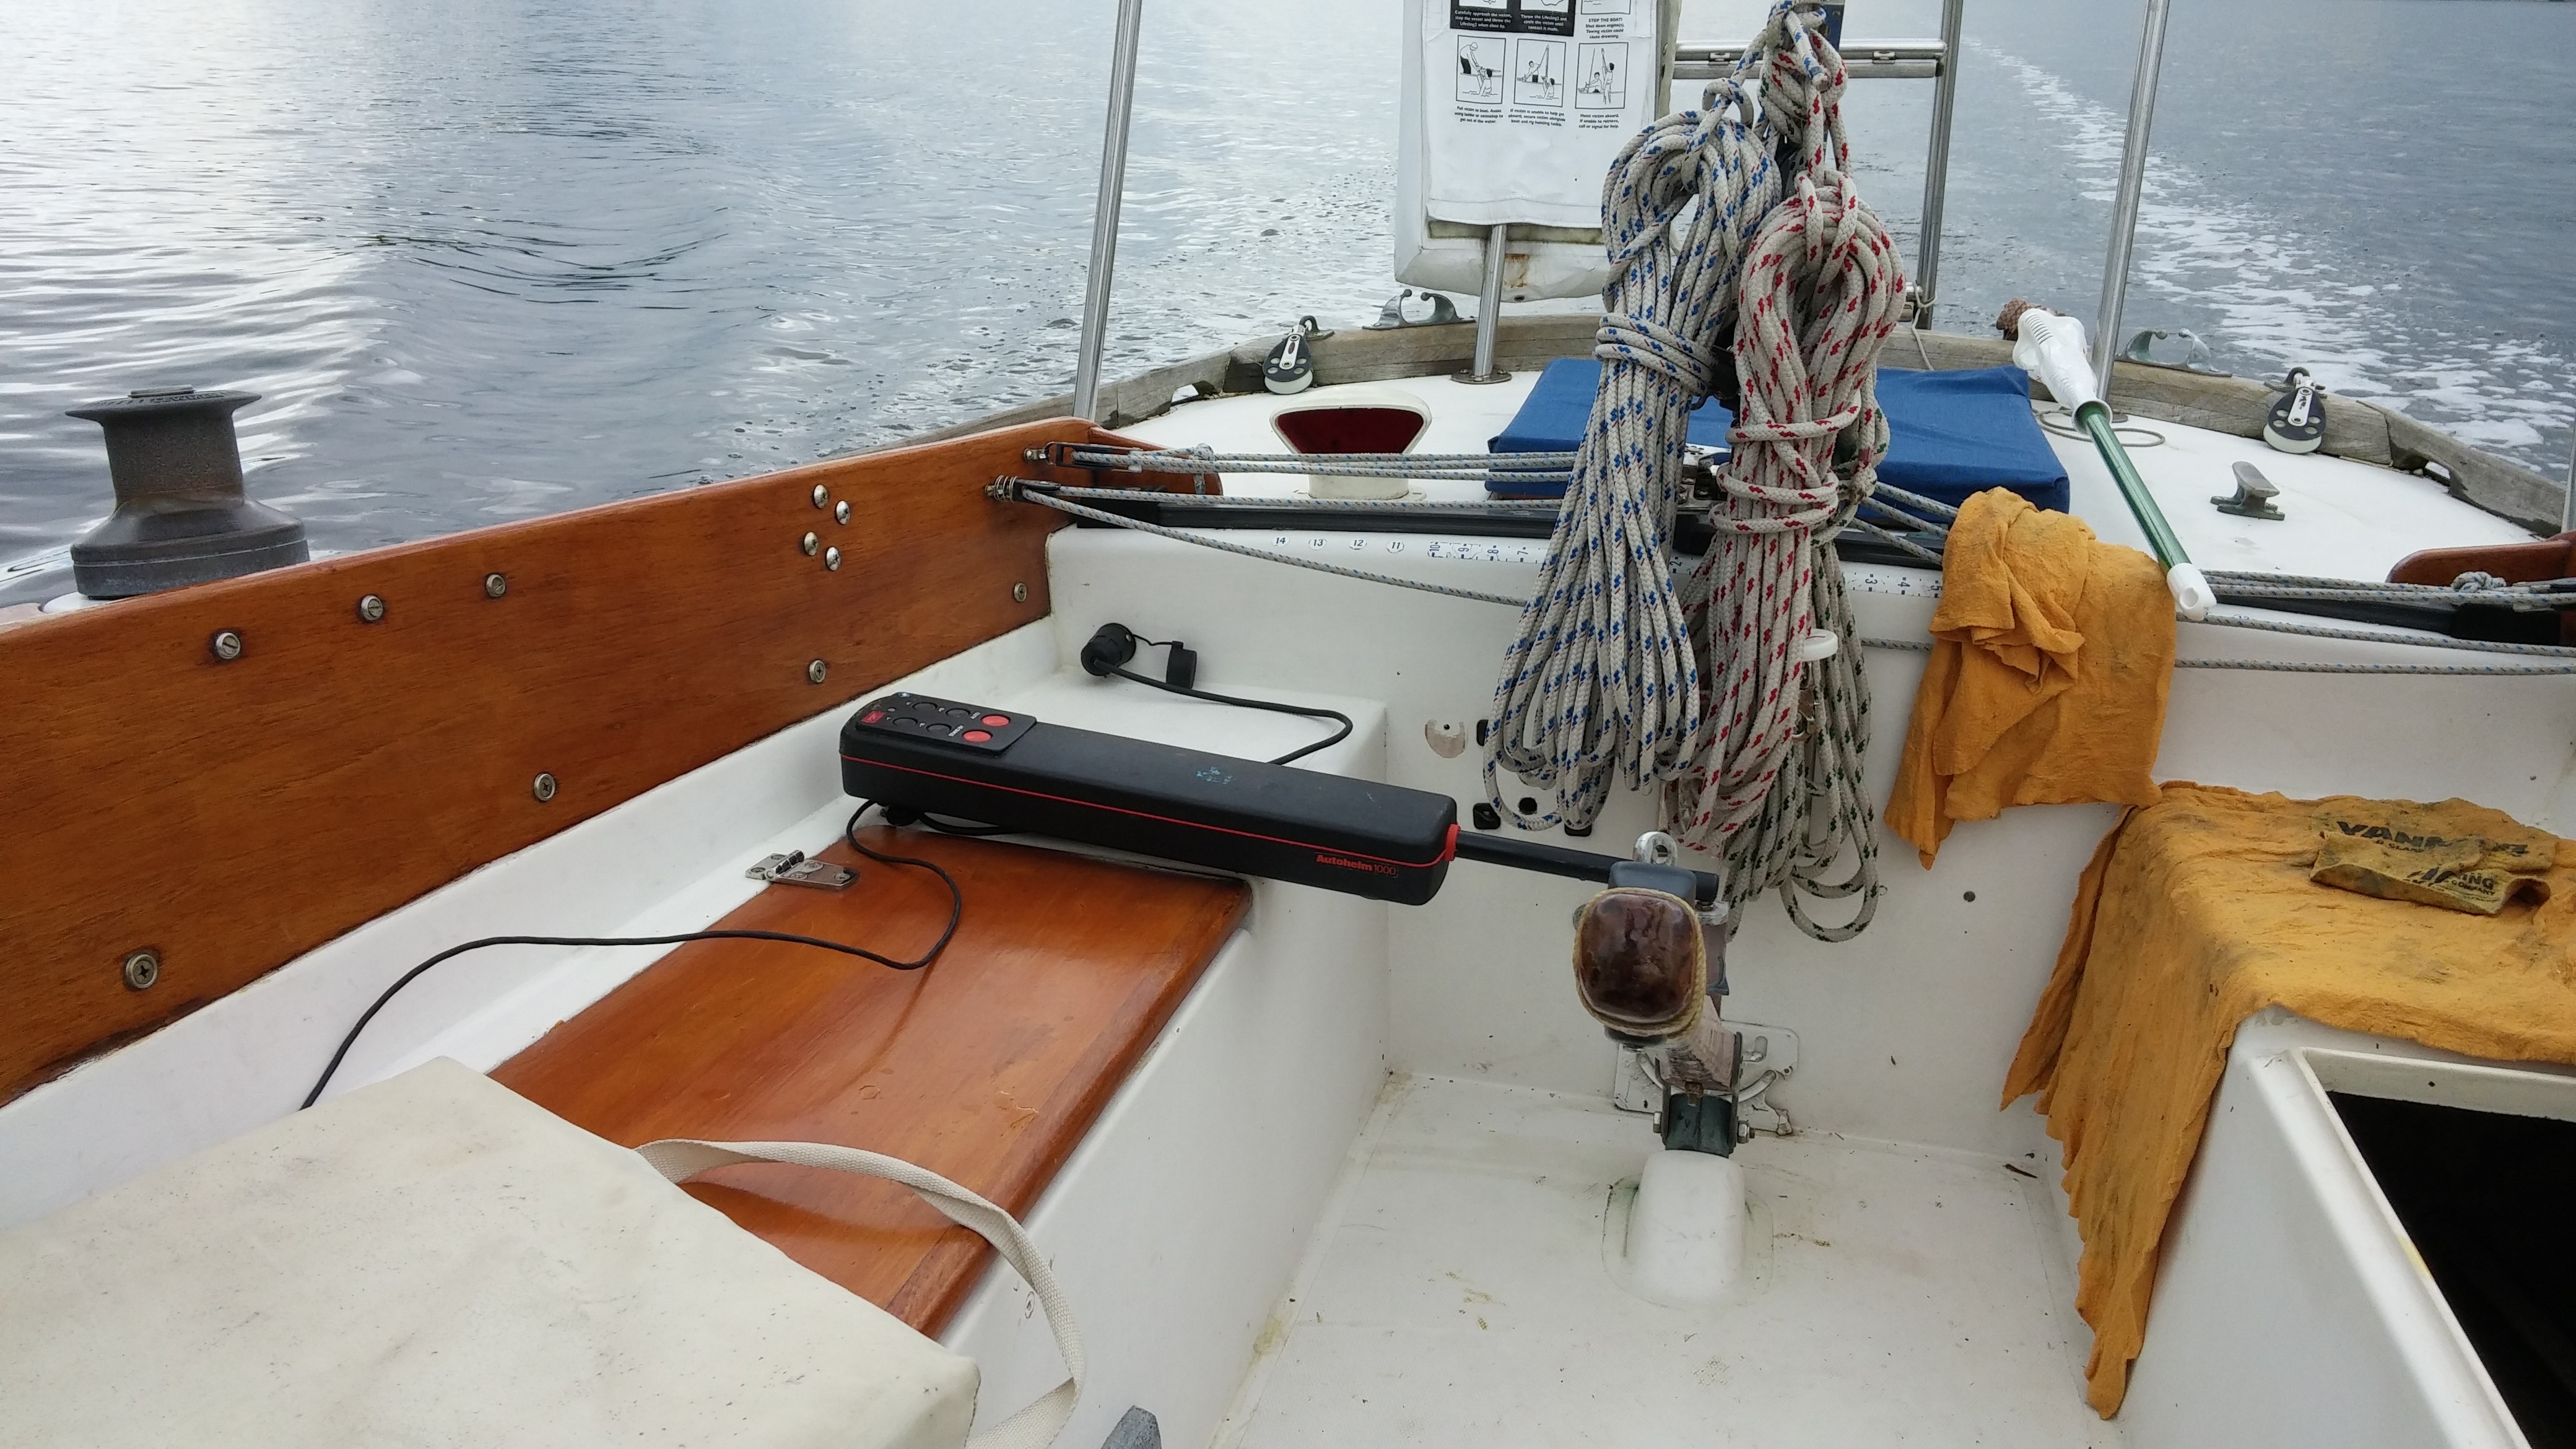
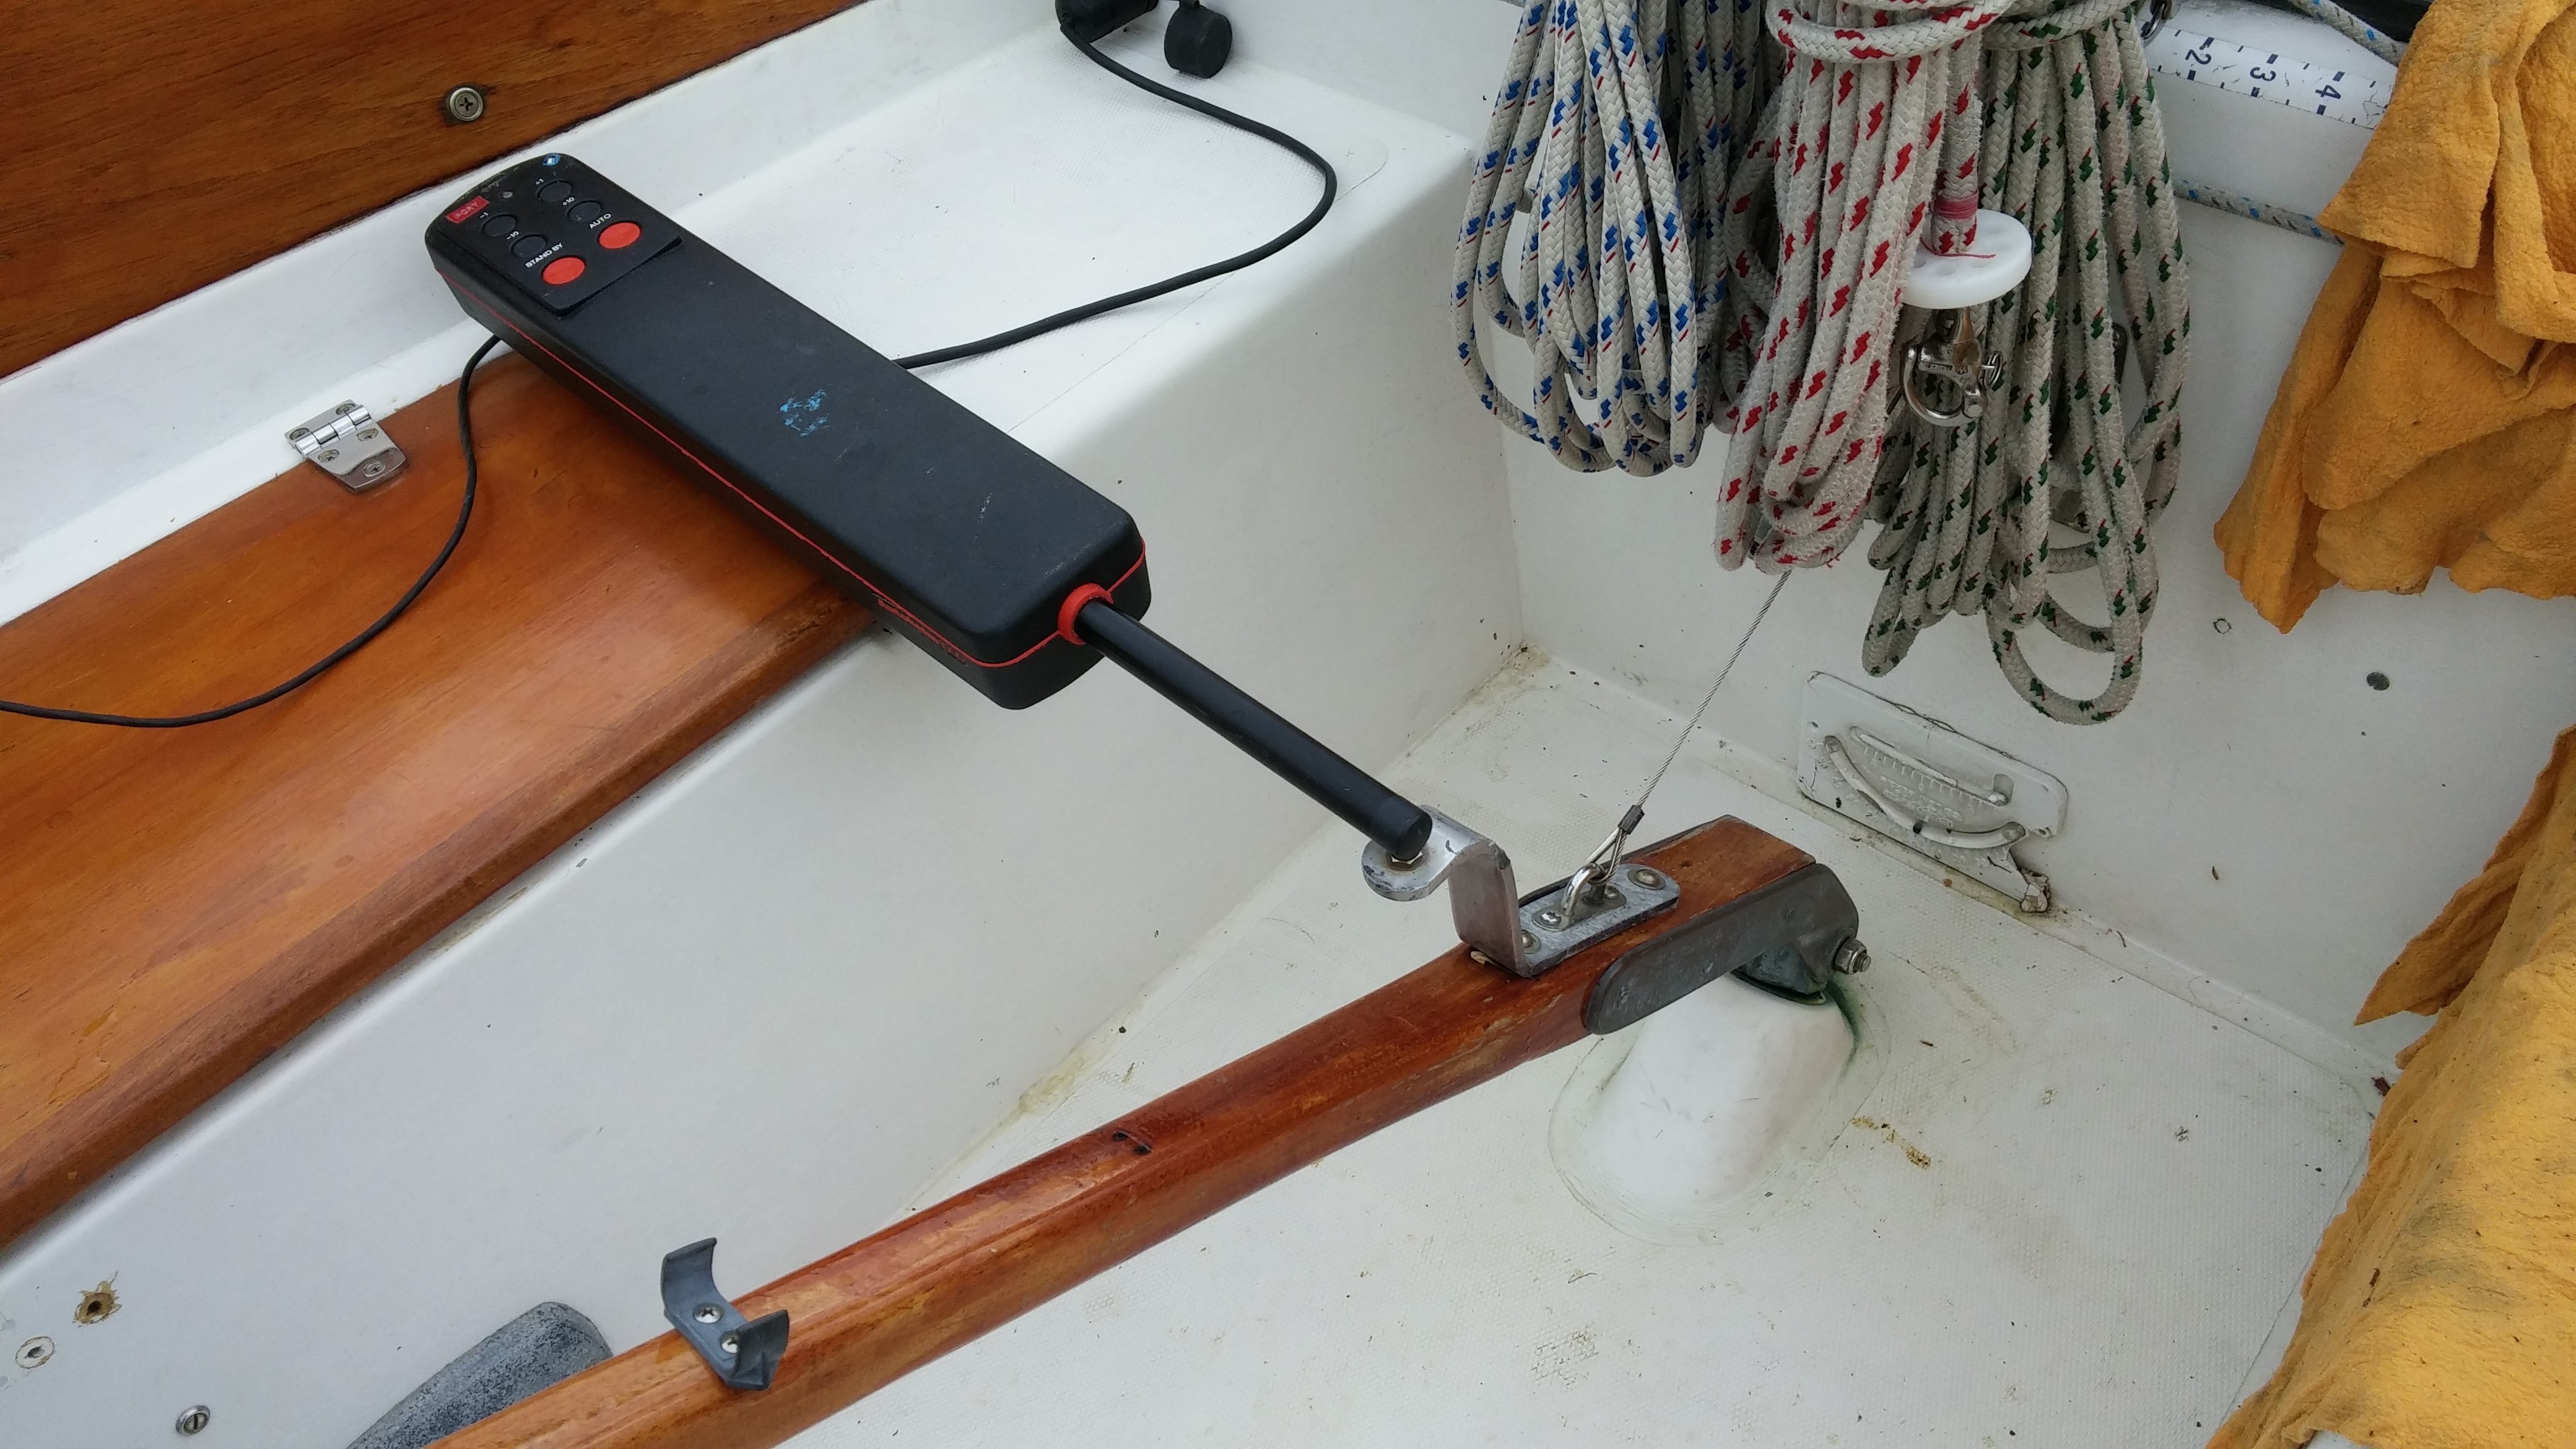
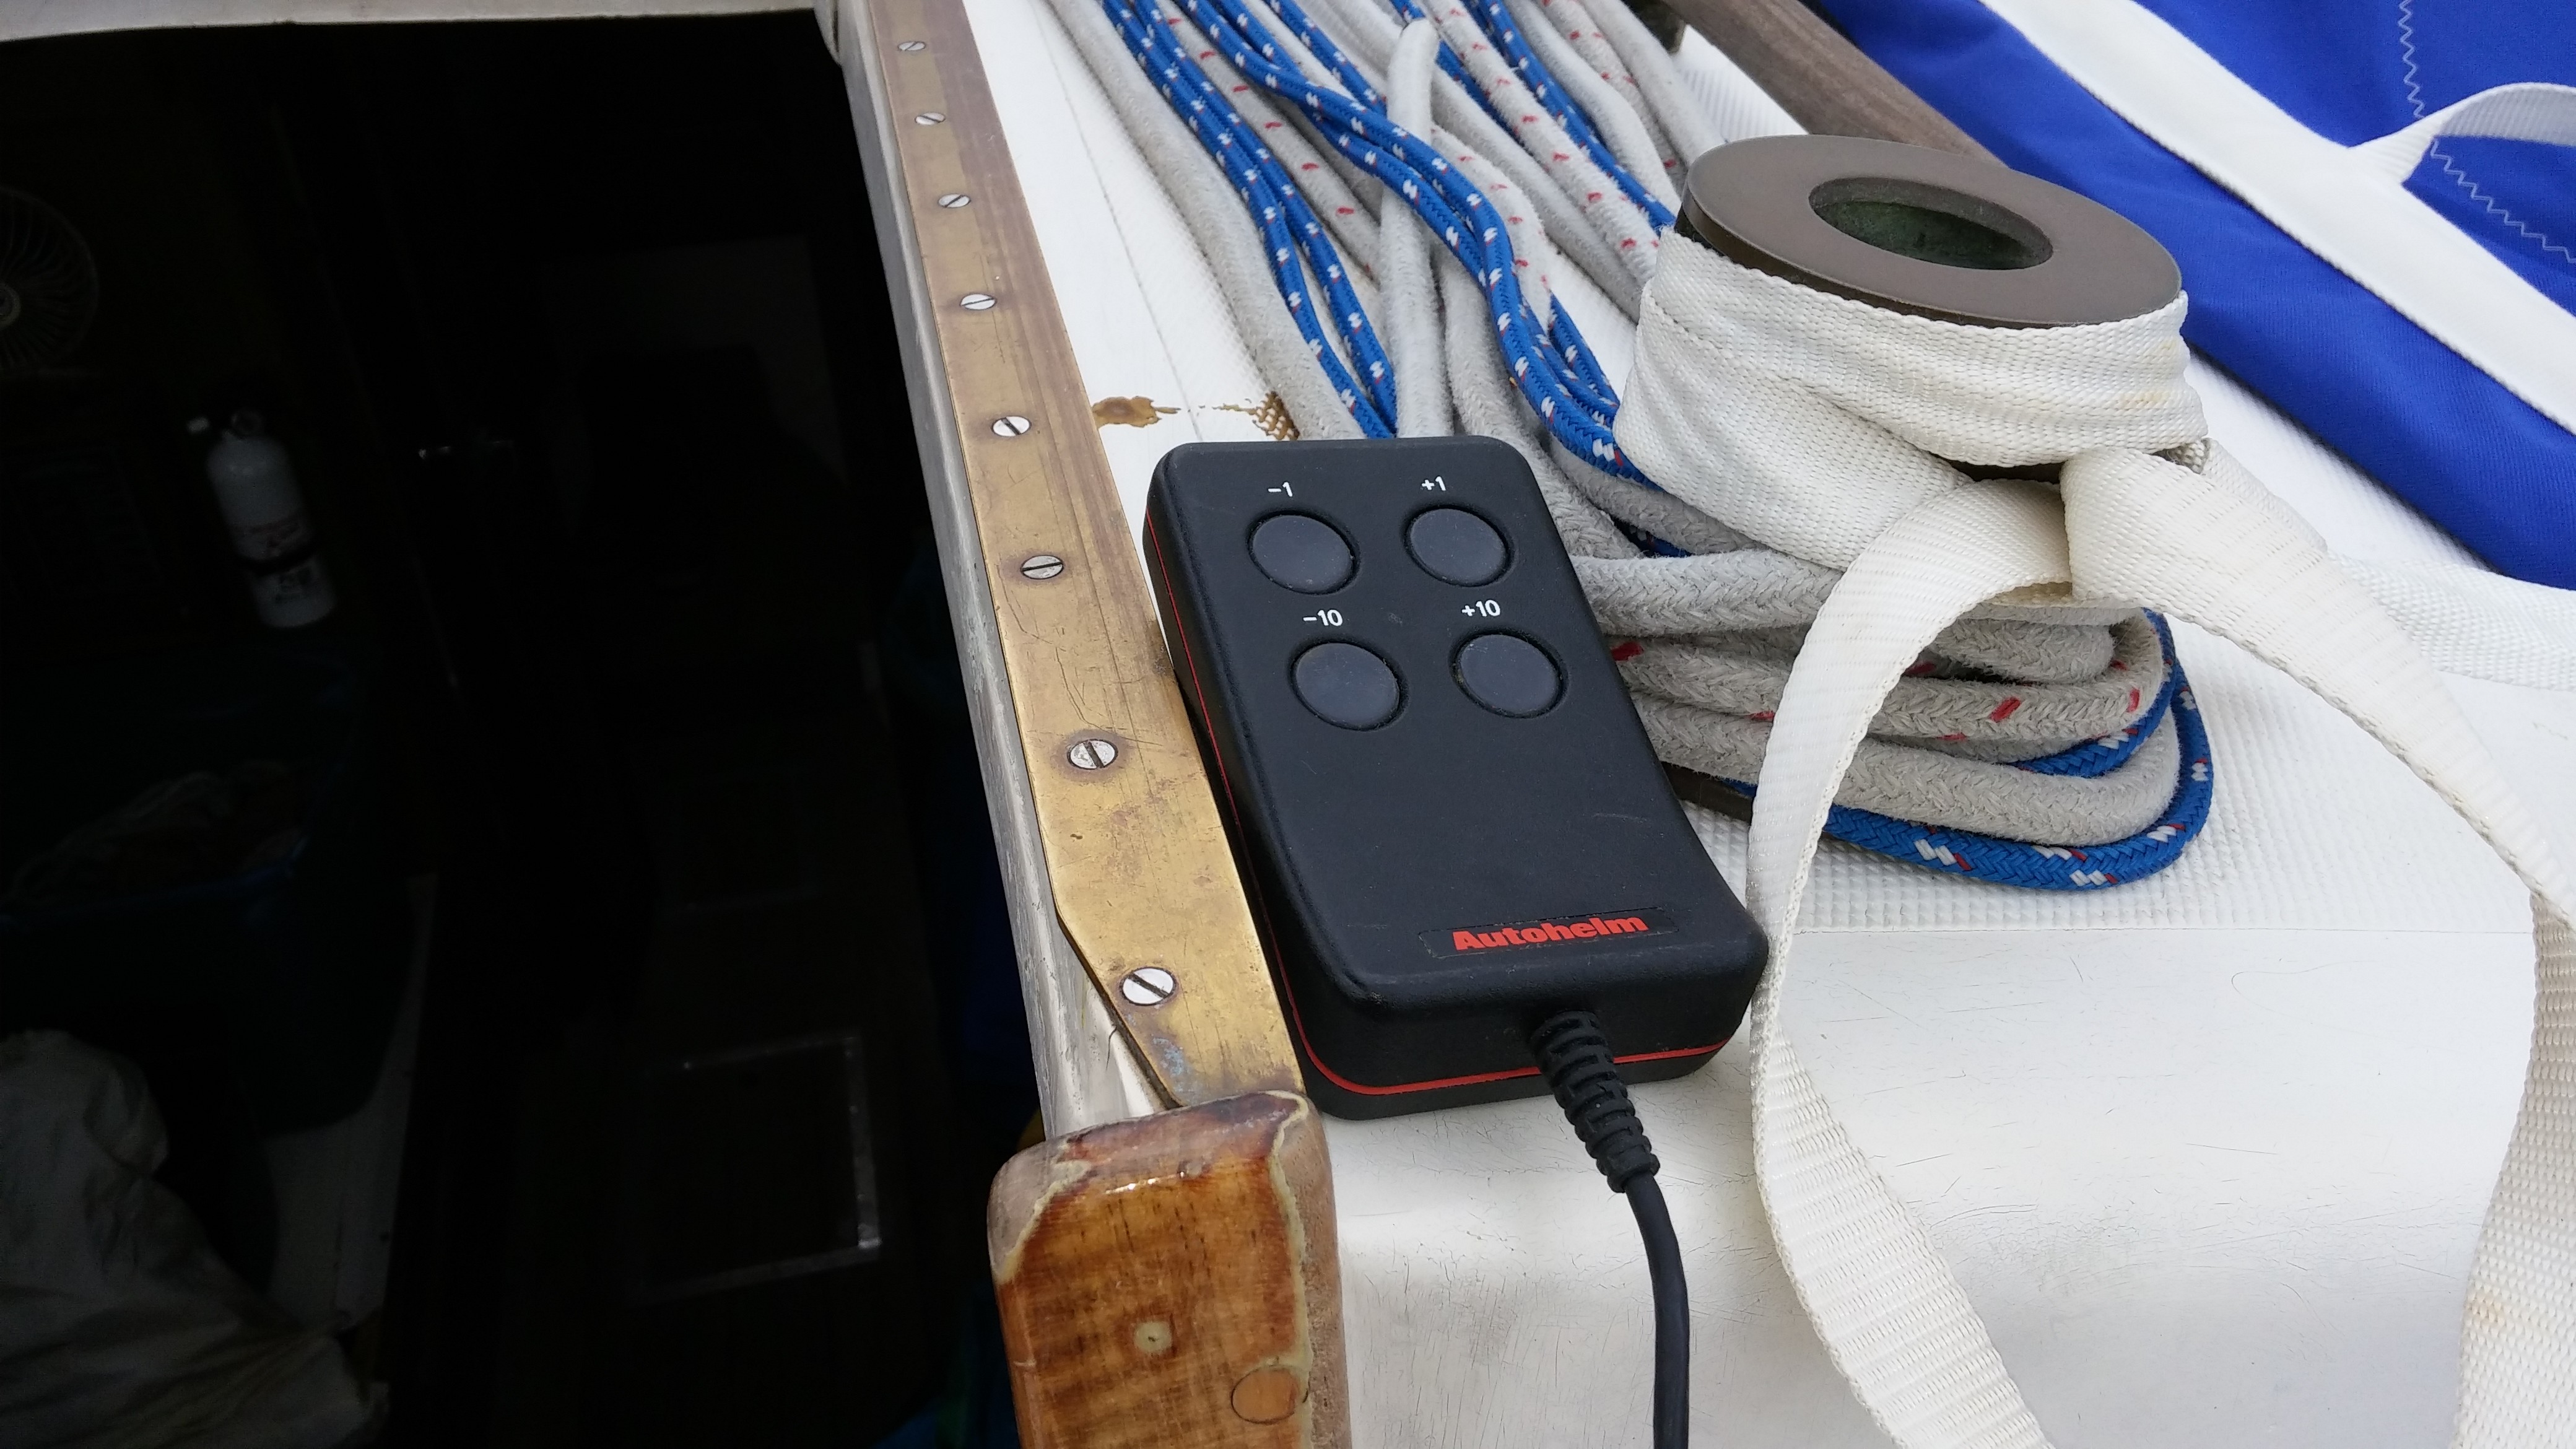
There was some discussion about how to rig the autohelm autopilot. This is how it is done on an old style boat (#197).

0507161124a0507161124b0507161124c

Leave a comment

Filed under Deck, Helpful Things, Products

Cockpit Floor Hatch

The following is the information on the replacement hatches that are in Cookin 464 and Gilleleje 505.

To mount the table, Mike 505 has drilled threaded holes into the hatch into the ribs to get enough purchase to ensure that the holes do not strip out.

> On 5/29/2015 11:36:52 AM, Jonathan Adams (laughing_gull@verizon.net)
wrote:
> > ok here is the info from Cookin and Gillilajie (or something like that)
> I just ordered my hatch from Hamilton Marine. I called them to ask
which was the best one and they said the Bowmar had was better. They are
the ONLY ones that have this hatch. There was NO advantage (other than a
slight savings in shipping cost) to order multiple hatches, so everyone
is ordering their own…especially since I didn’t want to run up a
$1,200 charge on my credit card. So here’s is what to
order… https://store.hamiltonmarine.com
> | HATCH BOMAR ALUM 10″ RND DECK HATCH W/ T HANDLE 104629 @ $
299.99orHATCH BOMAR ALUM 10″ RND DECK HATCH W/T-HNDL WHT 104630 @ 339.99
(If you want it white powder coated) The white ones are not in stock but
they have 3 on order from Bowmar. I ordered white because Trish likes to
be bare foot on the boat and the old hatch gets too hot to stand on. |
>
>

Leave a comment

Filed under Deck, Hardware, Products